The complete guide to 3D web embed and how to use it
A detailed look at what 3D WebAR embedding is and how to use it.
One of the biggest features of Vectary is web AR embedding. Here's a detailed look at what 3D WebAR embedding is and how to use it to achieve your business goals.
If you don't speak any programming language, web embedding might still be not a part of your vocabulary, but that's about to change. Web embed, or embedded file, is any type of media you can simply insert into your website by pasting a piece of HTML code or script.
Whether you want to make your blog post more interesting, add an interactive element to your website, make your customers experience products in AR, or highlight a part of an article with a design element from popular social media networks, it can bring a lot of value to your website and customers visiting it.
These days internet users come across web embeds every day. These come in the form of social media posts, on news and media websites, and many others. YouTube is probably one of the most recognized embeds. If you want to include a video in your blog post, more often than not, it will be a piece of code, that can be found under any YouTube video, and has been simply copied and pasted. 3D projects are moving in this direction too.
A 3D and AR web embed example
The image below is an interactive Vectary 3D viewer - it's called WebAR because it supports both the 3D web element and Augmented Reality experience. Try to rotate it or click on the AR icon to see it in Augmented Reality:
How to prepare WebAR embed in Vectary
Step 1: Create a 3D object or 3D scene
To embed an object on a blog or website, you need to plan where you want the embedded object to appear. Based on that you can prepare the embed so it fits naturally into the surroundings of the website. There are several ways you can create a 3D project that is web-friendly.
Import your own 3D model
If you’re already experienced in 3D modeling you will probably have a few models and files to start your 3D web embed. Simply import them to Vectary and wait until they load. Currently, we support over 60 file formats including: .obj, .dae, .stl, .gltf, .glb, .jpg, .png, .svg, you check out the whole list of all the supported formats here.
Use the library and access 3D repositories or pre-made collections
For beginners in 3D modeling, we created a set of curated collections that consists of assets, materials, and environments. Once you’ve found it, drag & drop it onto the scene and continue with generating the embed.
Create a project from scratch
For advanced users, Vectary offers intuitive mesh-modeling in edit mode. Similar to importing projects, you can create it from scratch or edit an existing one you imported, or placed on the scene from the library. When you’re finished with 3D modeling, continue with generating your embed code.
Step 2: How to generate a 3D web embed code
Once you are ready and have your project and 3D object prepared, creating a WebAR embed code is really easy and straightforward. Our software does all the work for you with a simple click on the Share button and toggle Share to web. Once this is finished an iframe code is generated and is ready to be used in your HTML code.
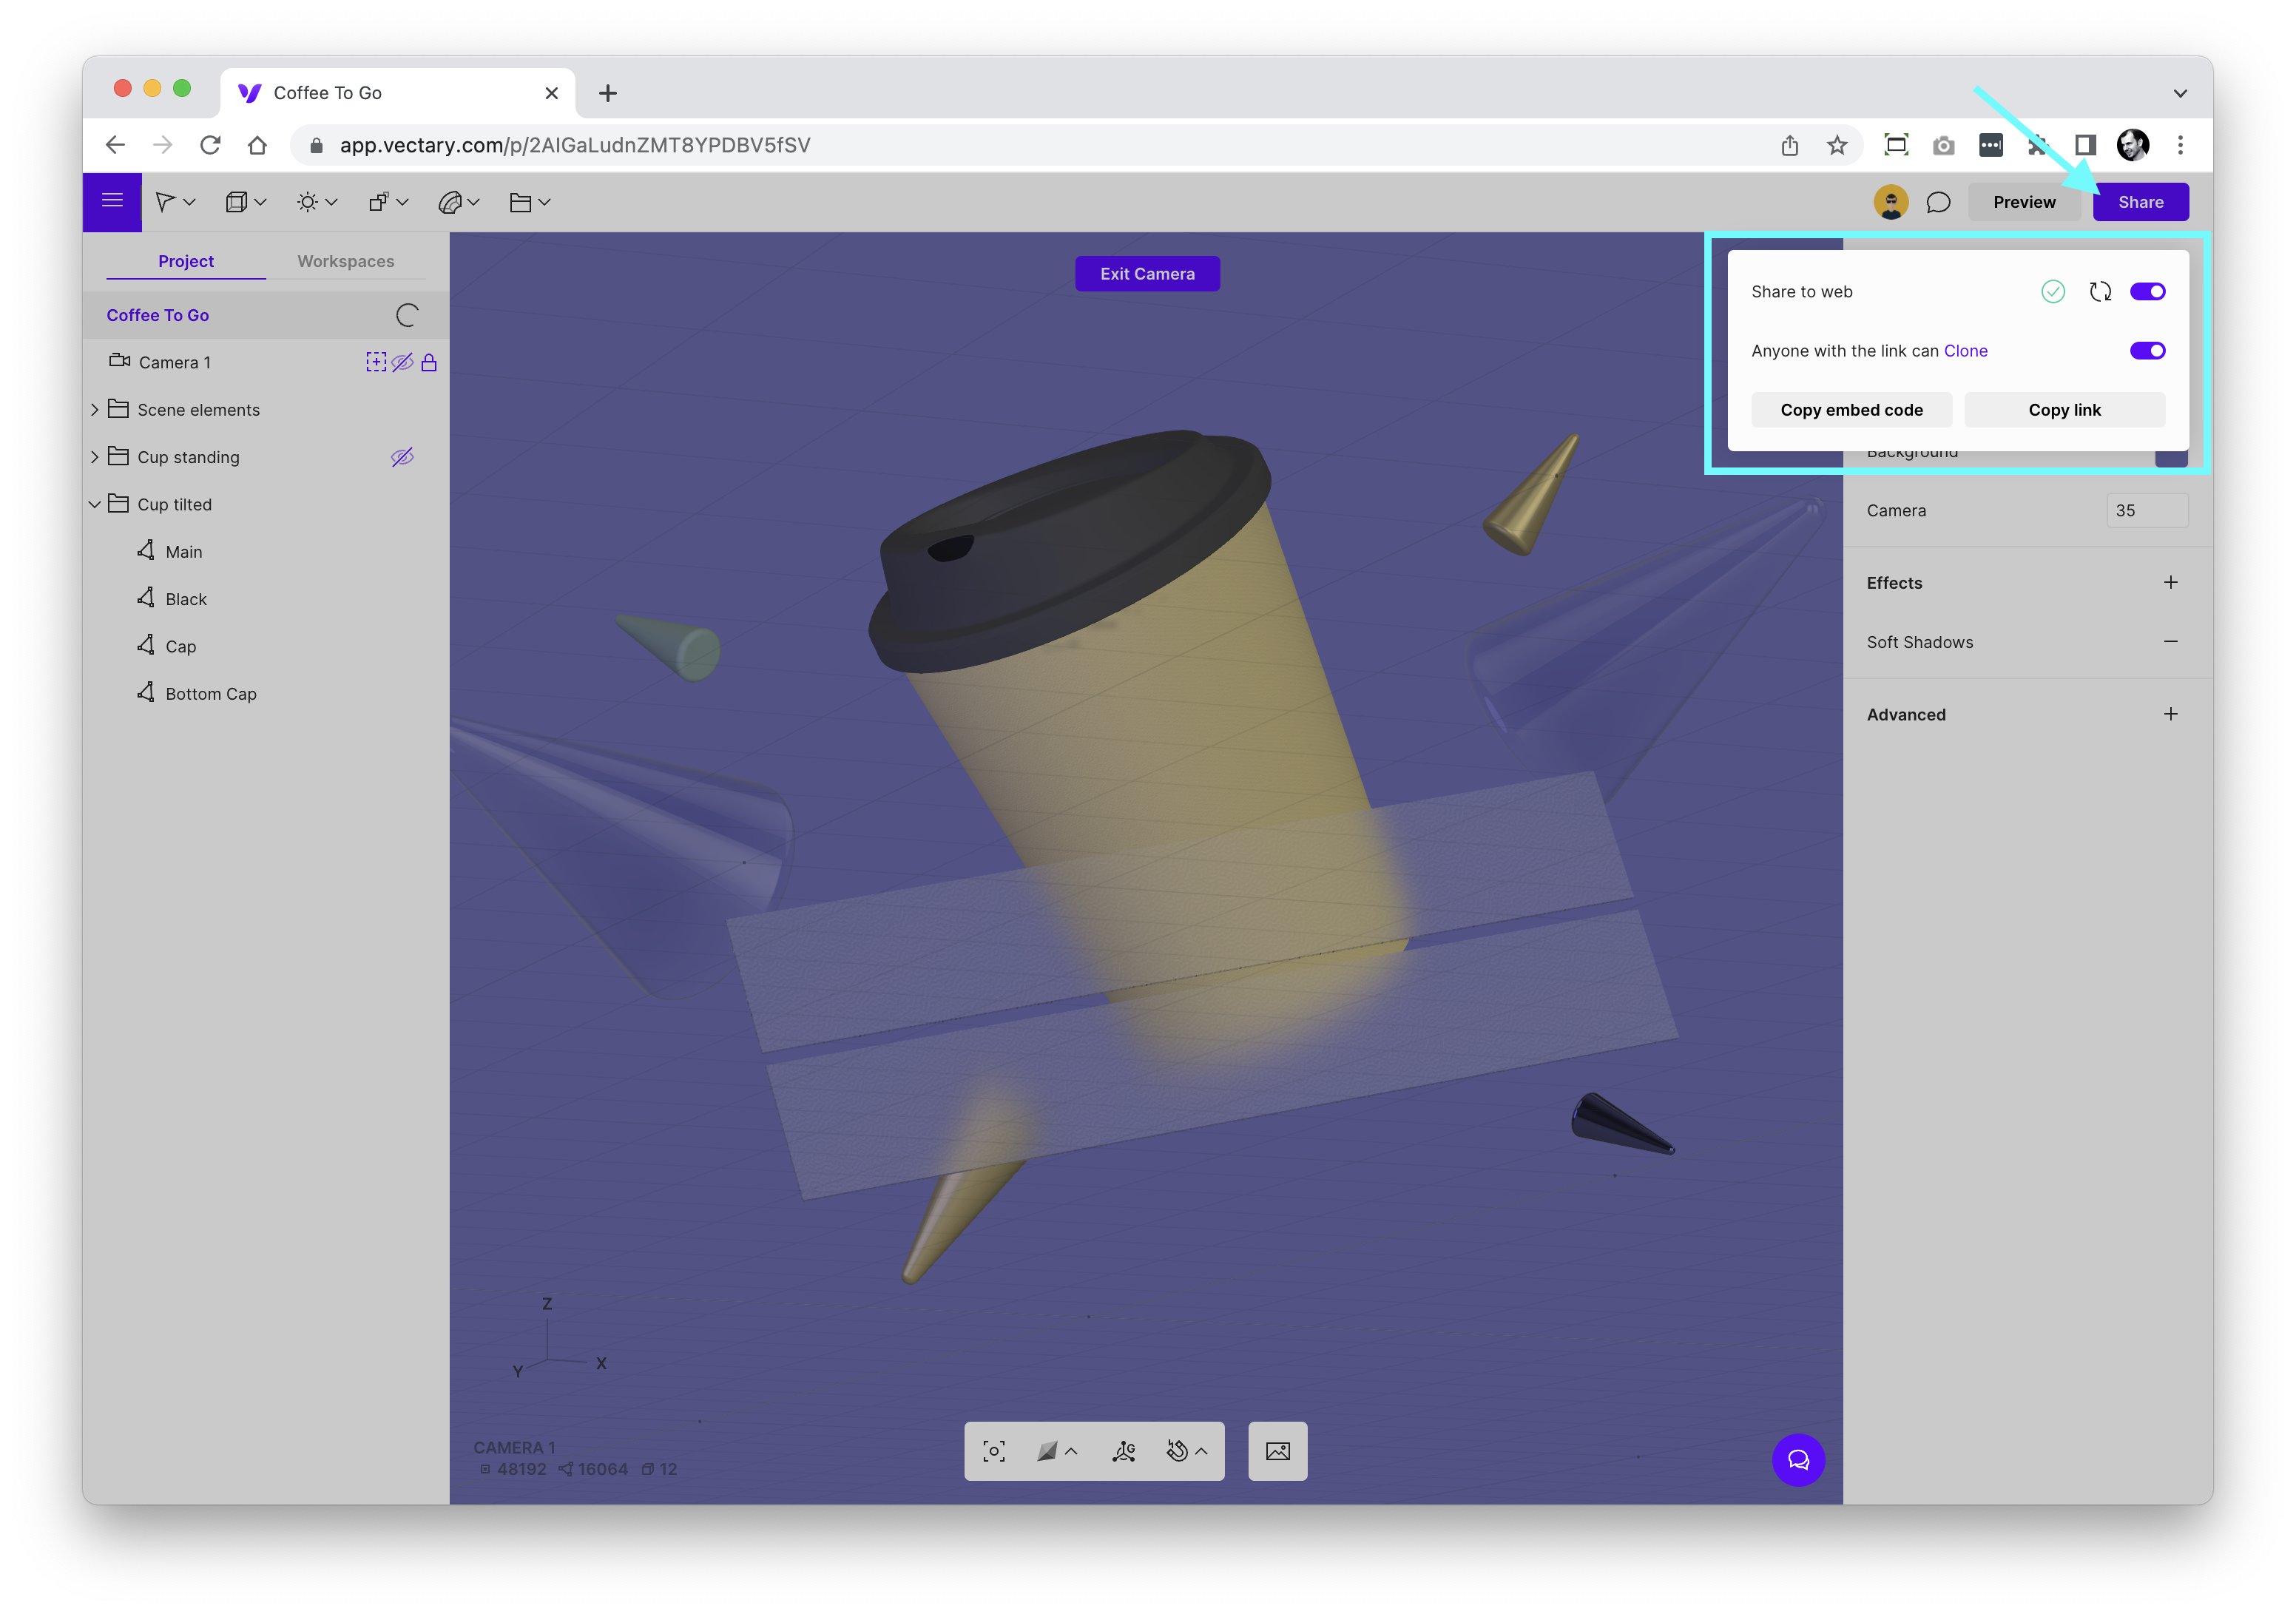
Vectary 3D web embed settings
You have the option to customize the outcome of your embed in the advanced menu:
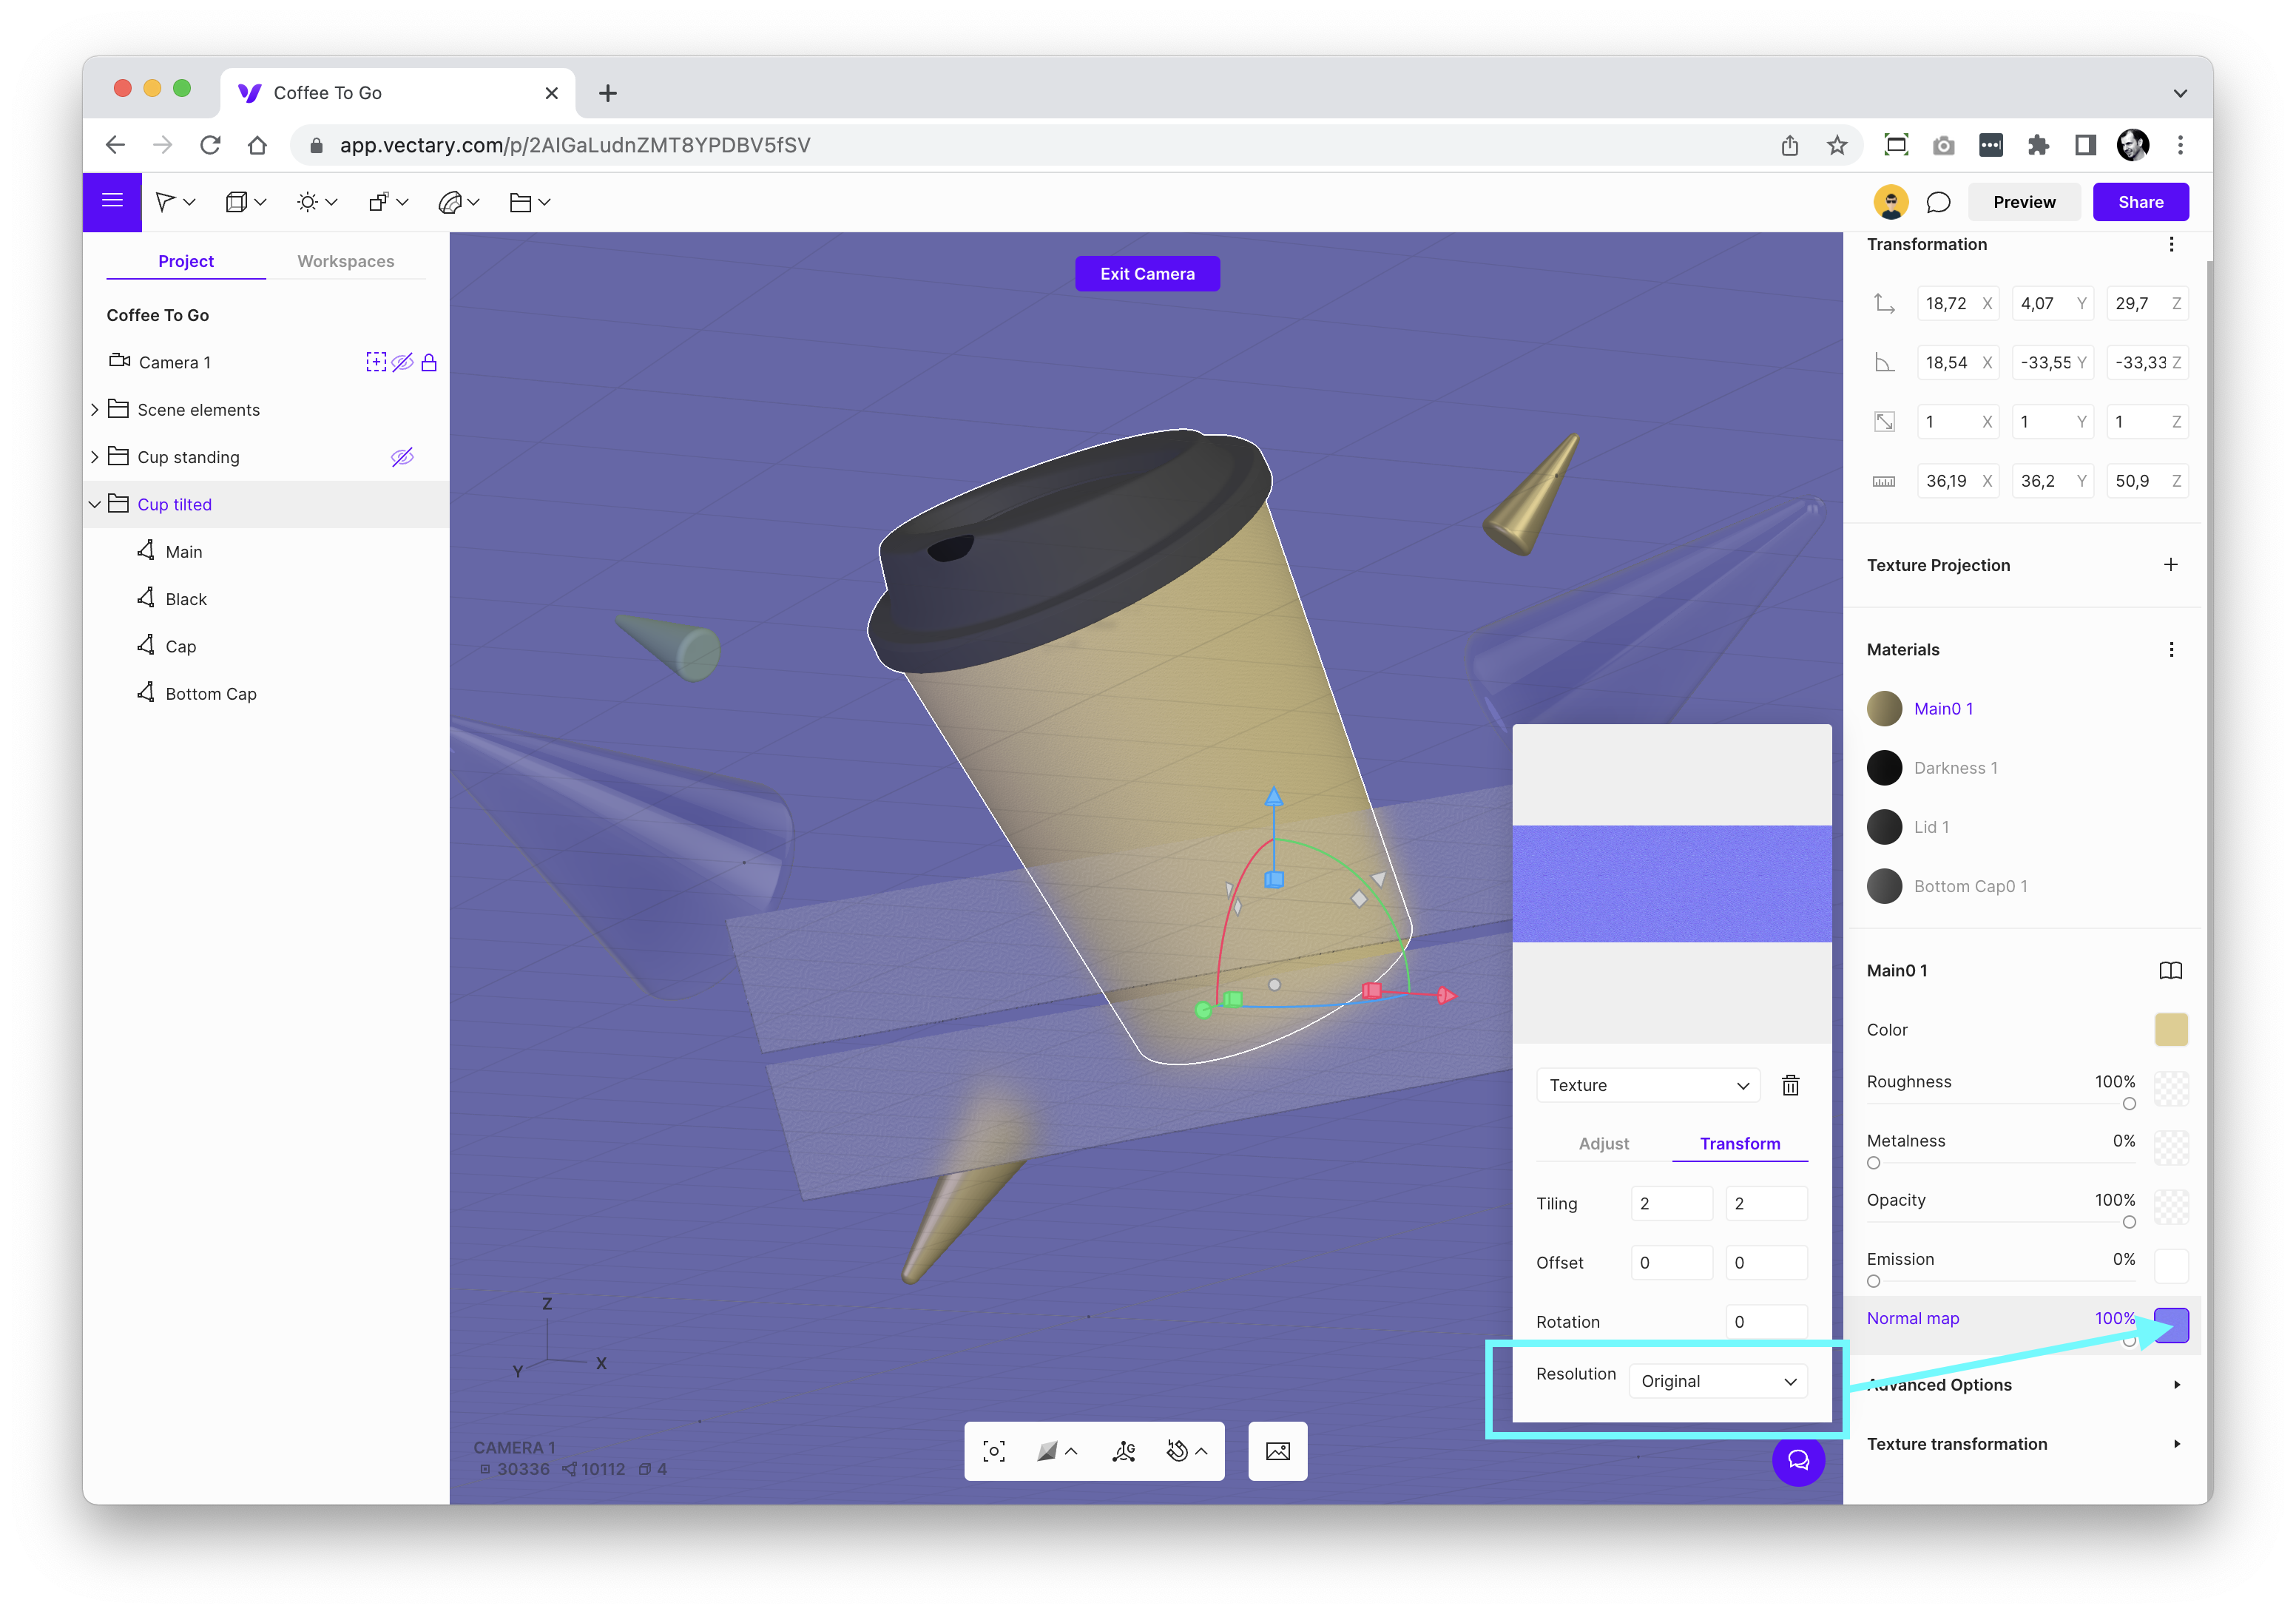
Texture quality
The most important parameter that affects embed is texture quality. More detailed textures take more time to generate as they are very detailed. They might also have a slower performance when implemented on the website. On the other hand, smaller resolution textures are faster to load. You can individually lower the quality for each texture used in your materials.
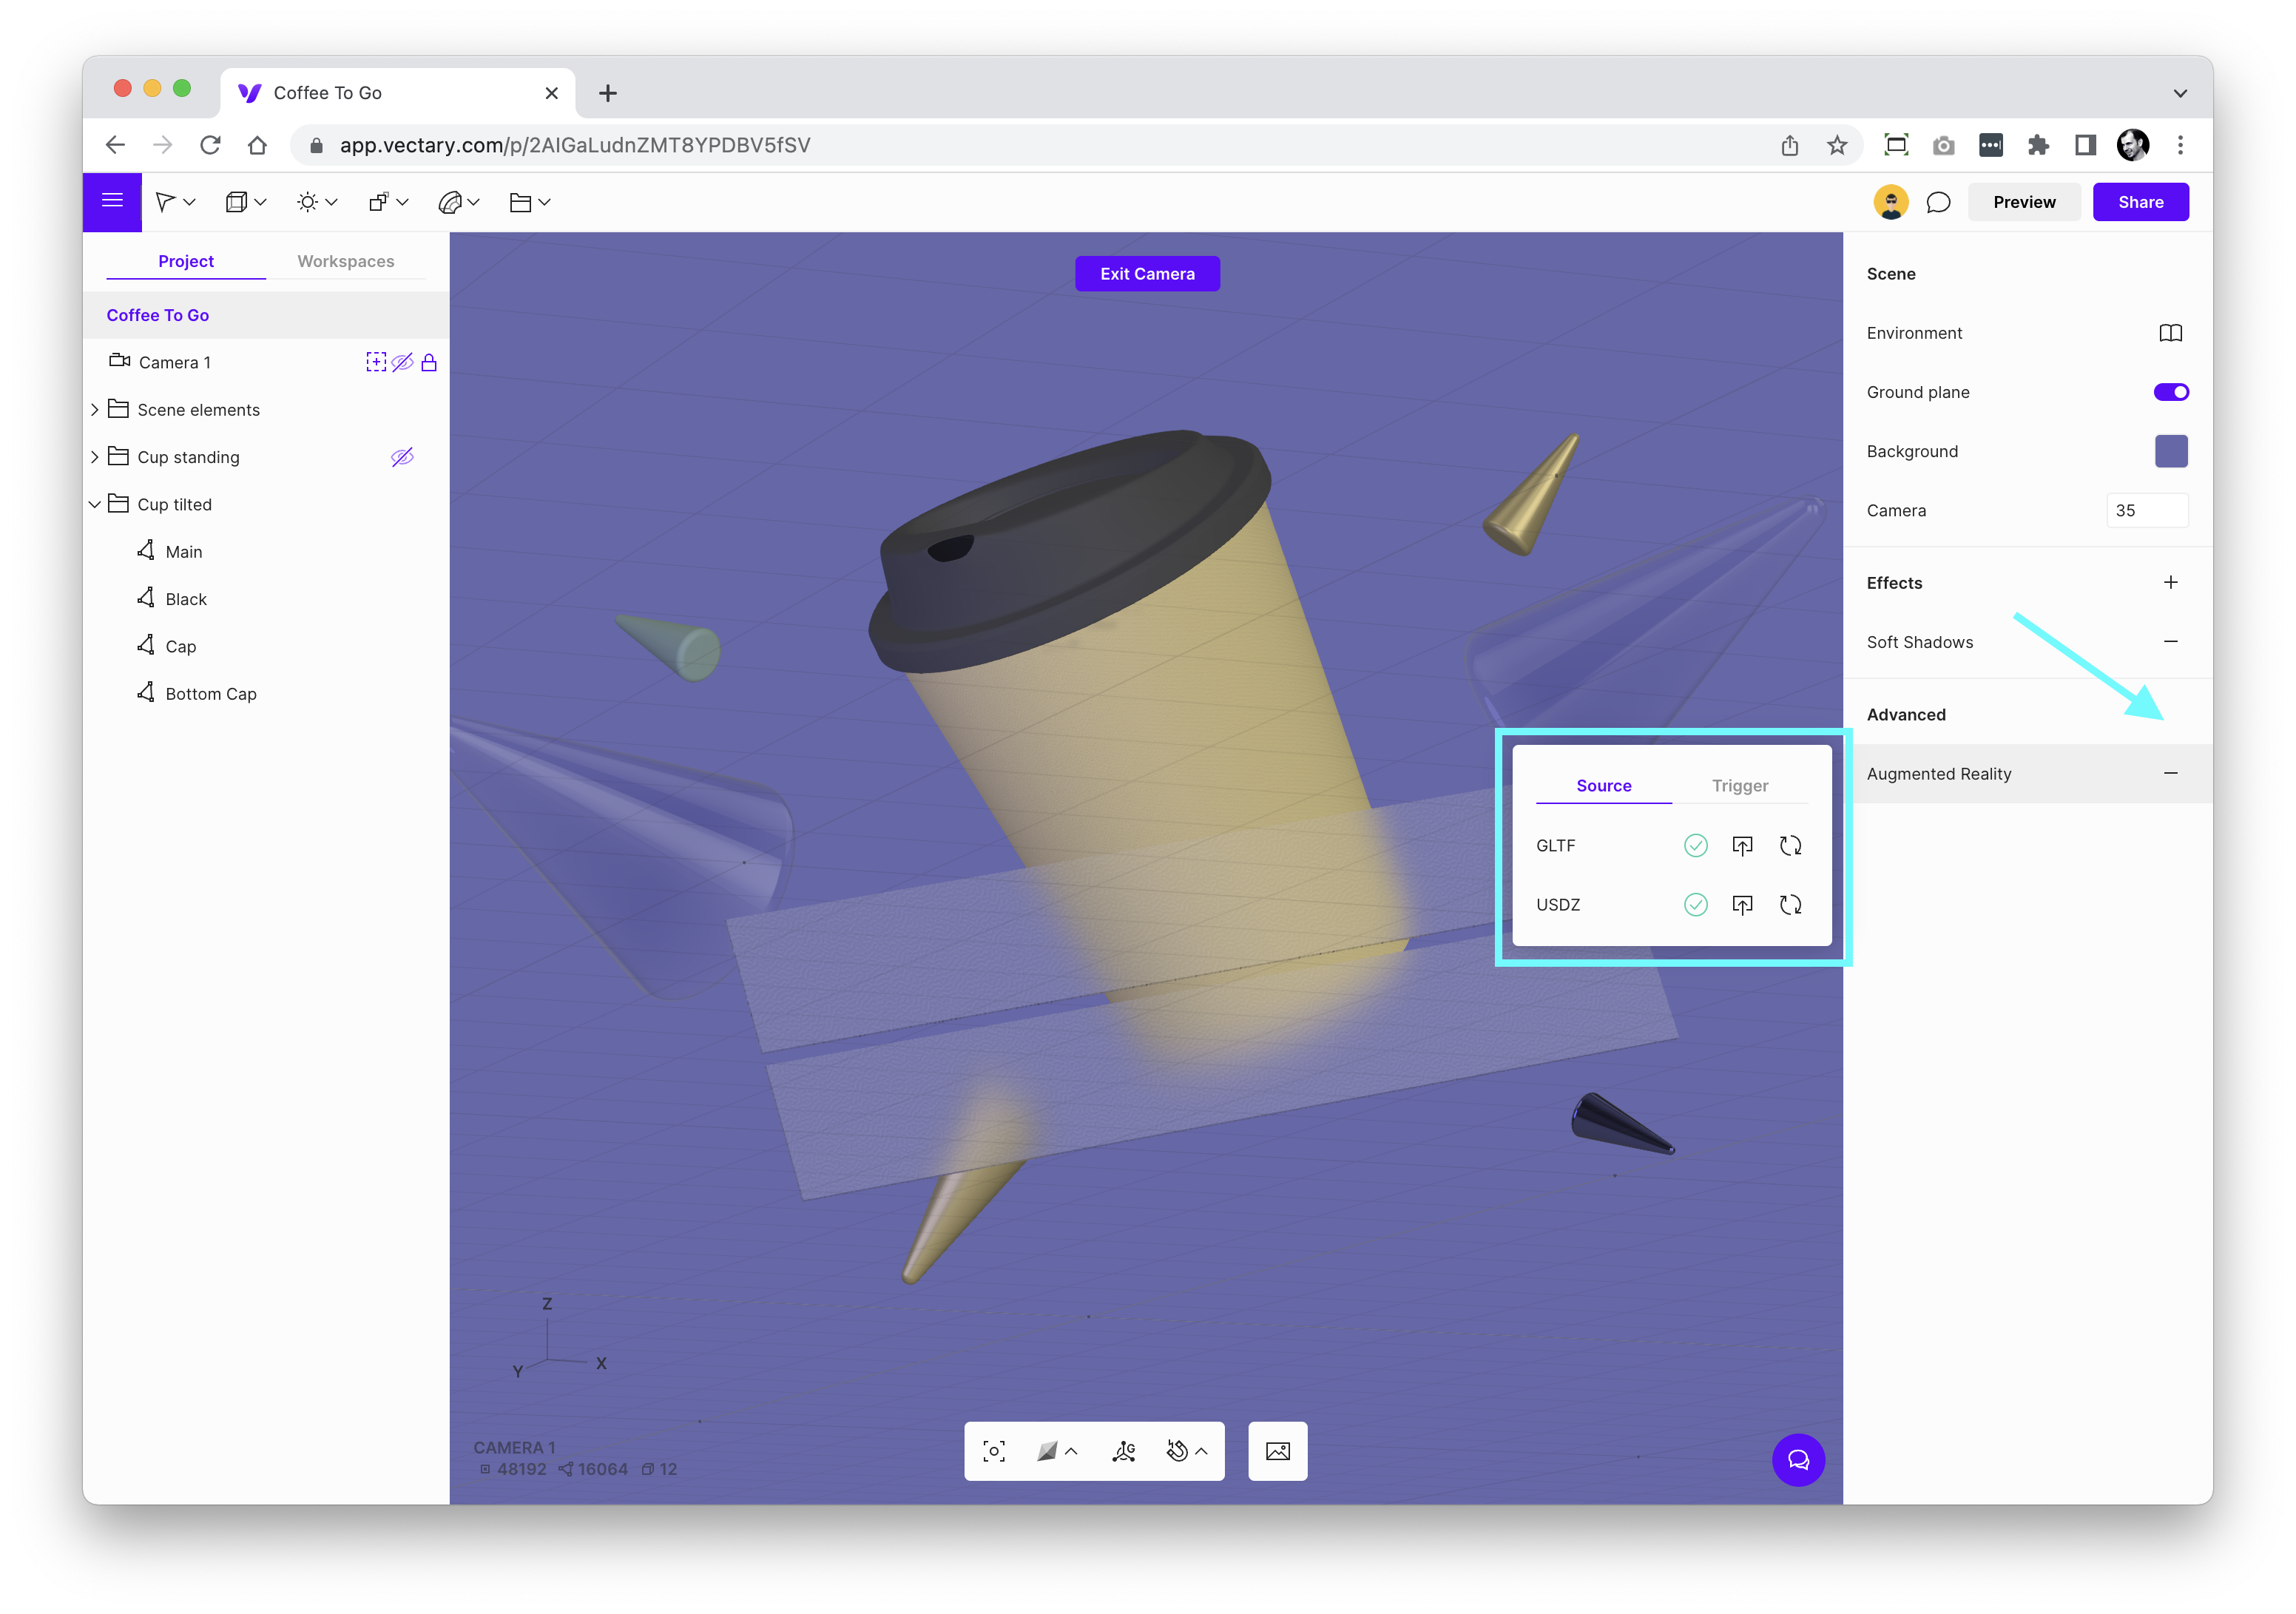
Augmented reality
Add Augmented Reality from the Advanced menu in your Project properties panel in Vectary Studio. The required files for different platforms (Android, iOS) are automatically generated in the background.
Center camera view
To center the camera on your main object, first, make sure you have entered the camera (indicated with a “+” icon next to the camera name). Then click on the object (or group of objects) and click on fit view icon in the toolbar on the bottom (shortcut key “a”). This will center the pivot point of the camera to your selected objects (If nothing was selected it will center the camera to the middle of the scene). Scroll to zoom in/out, pan, rotate to adjust your view.
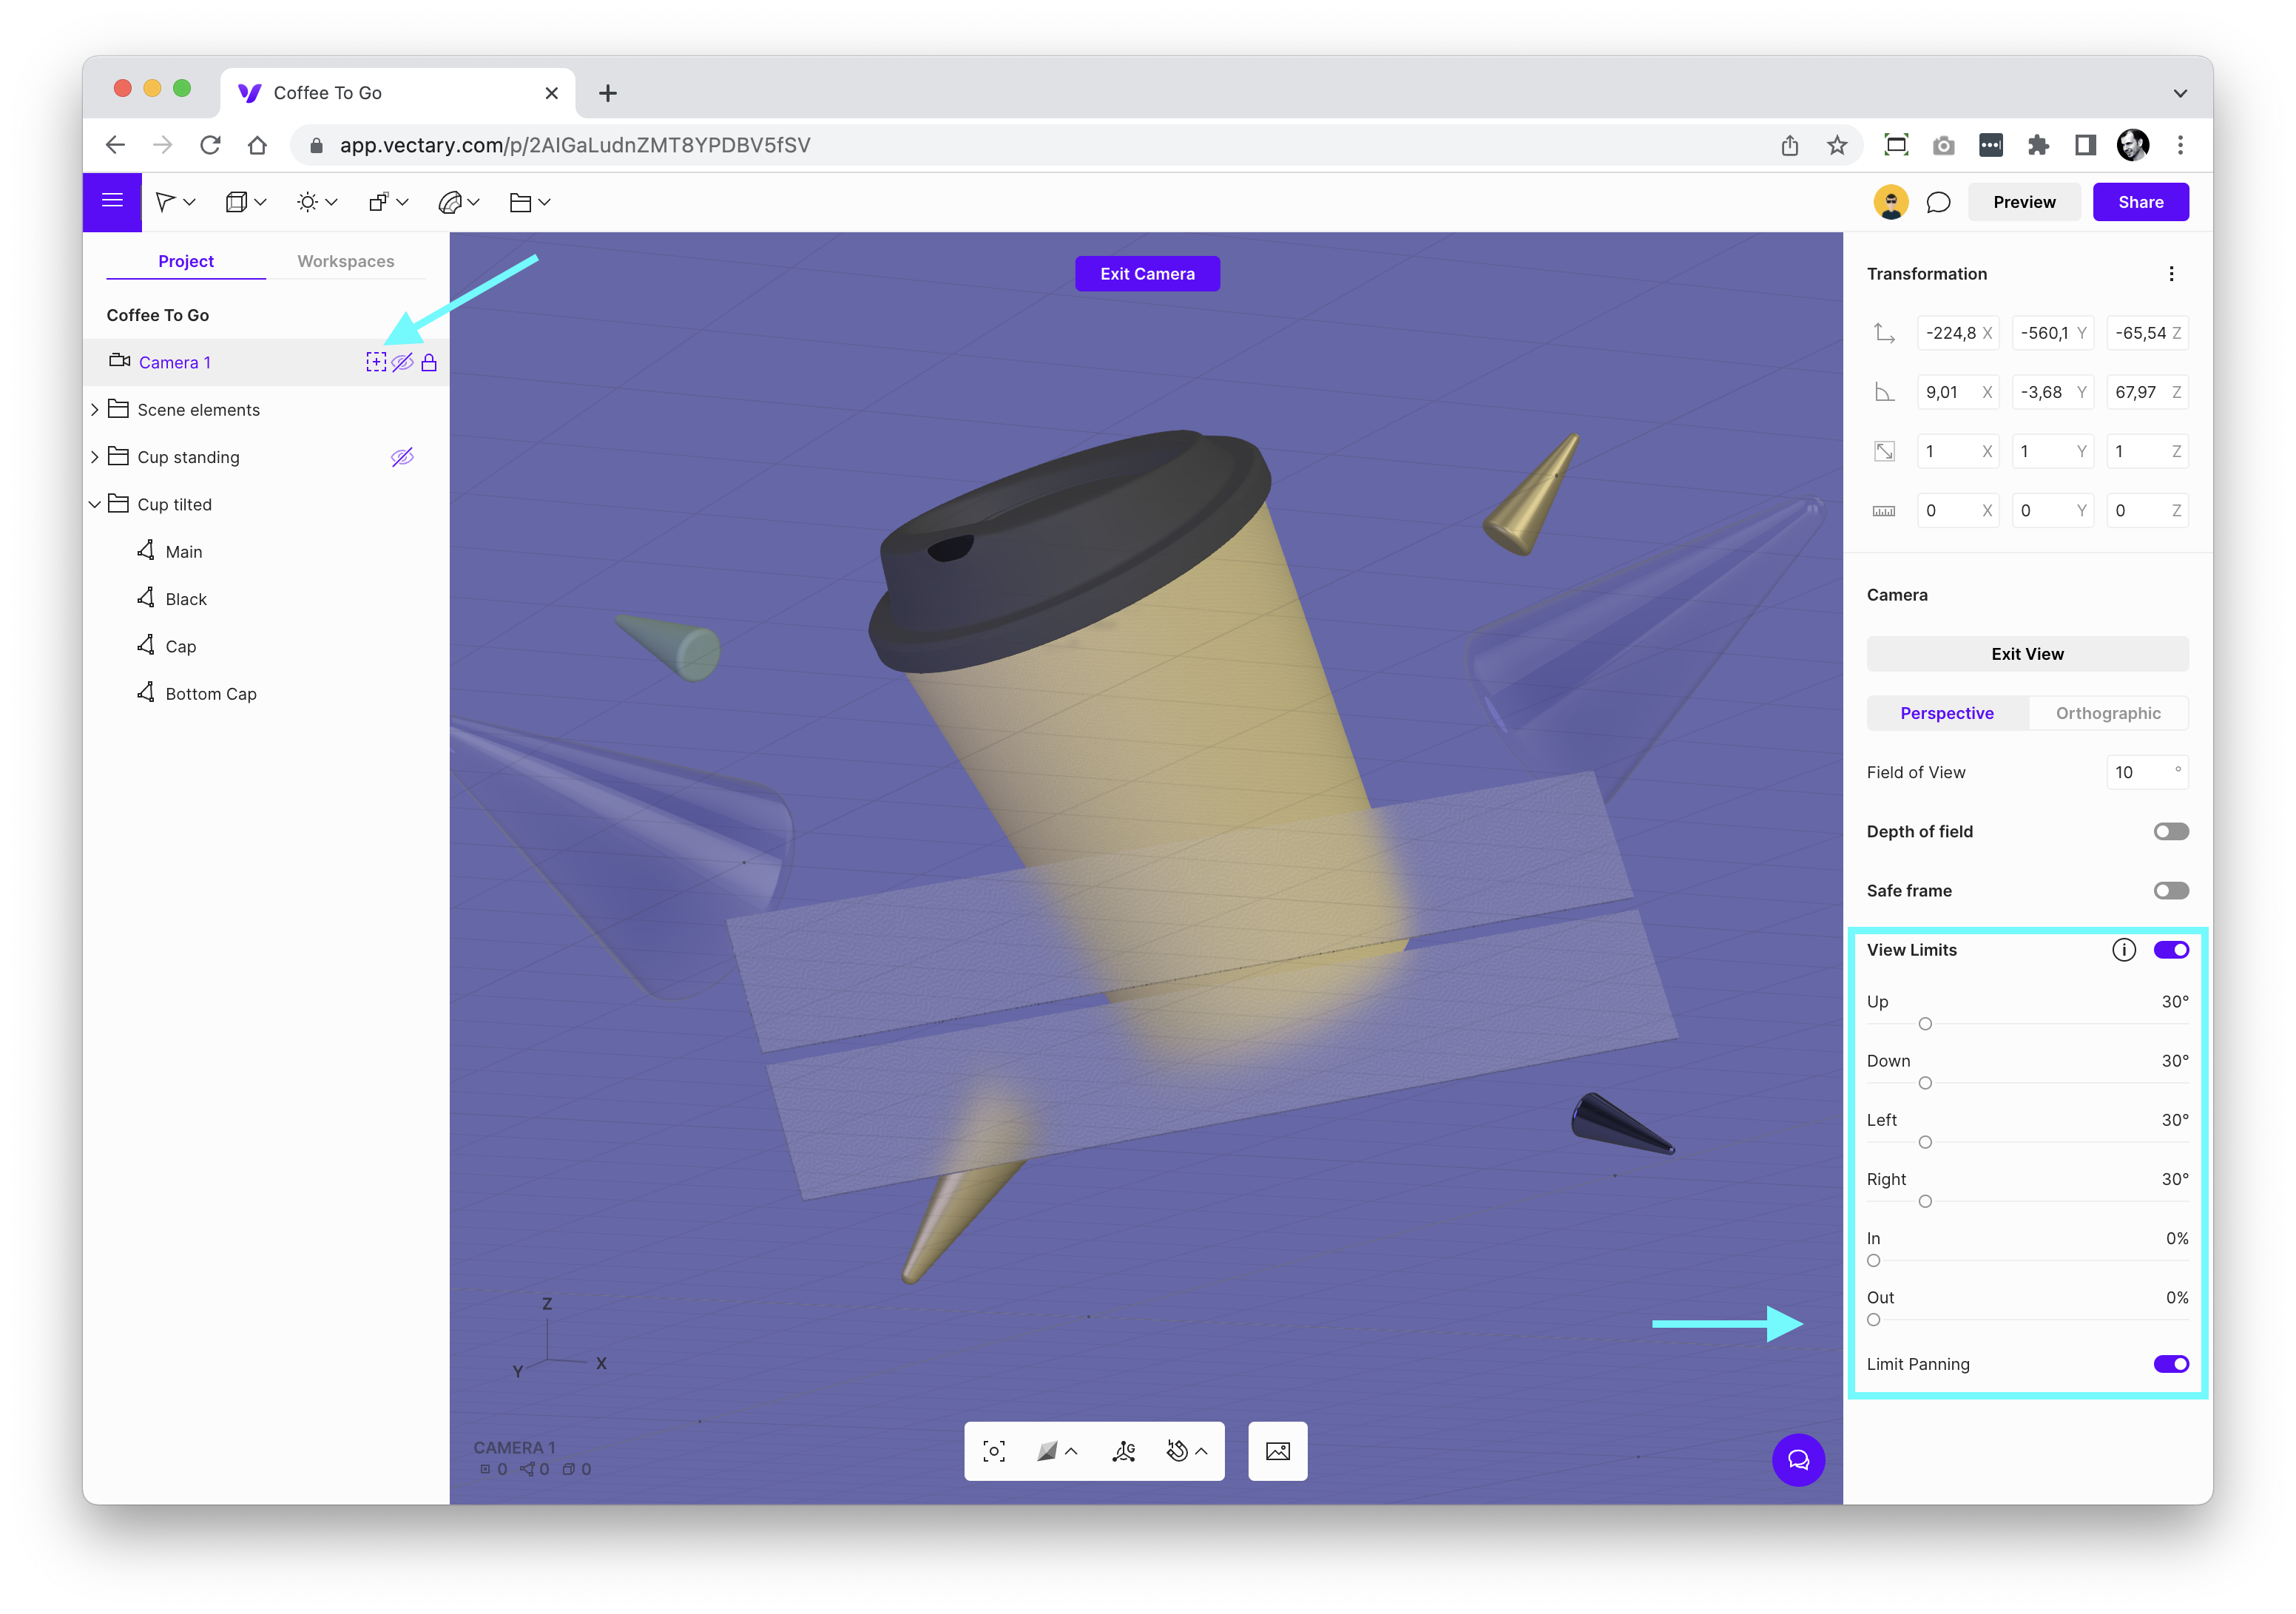
Limited camera view
Add a camera from the toolbar to your scene. Since you can have multiple cameras in your project you need to “enter” the camera to actually use the camera settings in the shared project. Select your camera and modify settings in the properties panel on the right. Enable View Limits (toggle) to restrict viewing angles, panning, and zooming. Click on the Preview to try out your new settings. To center the camera on your main object, first, make sure you have entered the camera (indicated with a “+” icon next to the camera name). Then click on the object (or group of objects) and click on fit view icon in the toolbar on the bottom (shortcut key “a”). This will center the pivot point of the camera to your selected objects (If nothing was selected it will center the camera to the middle of the scene). Scroll to zoom in/out, pan, rotate to adjust your view.
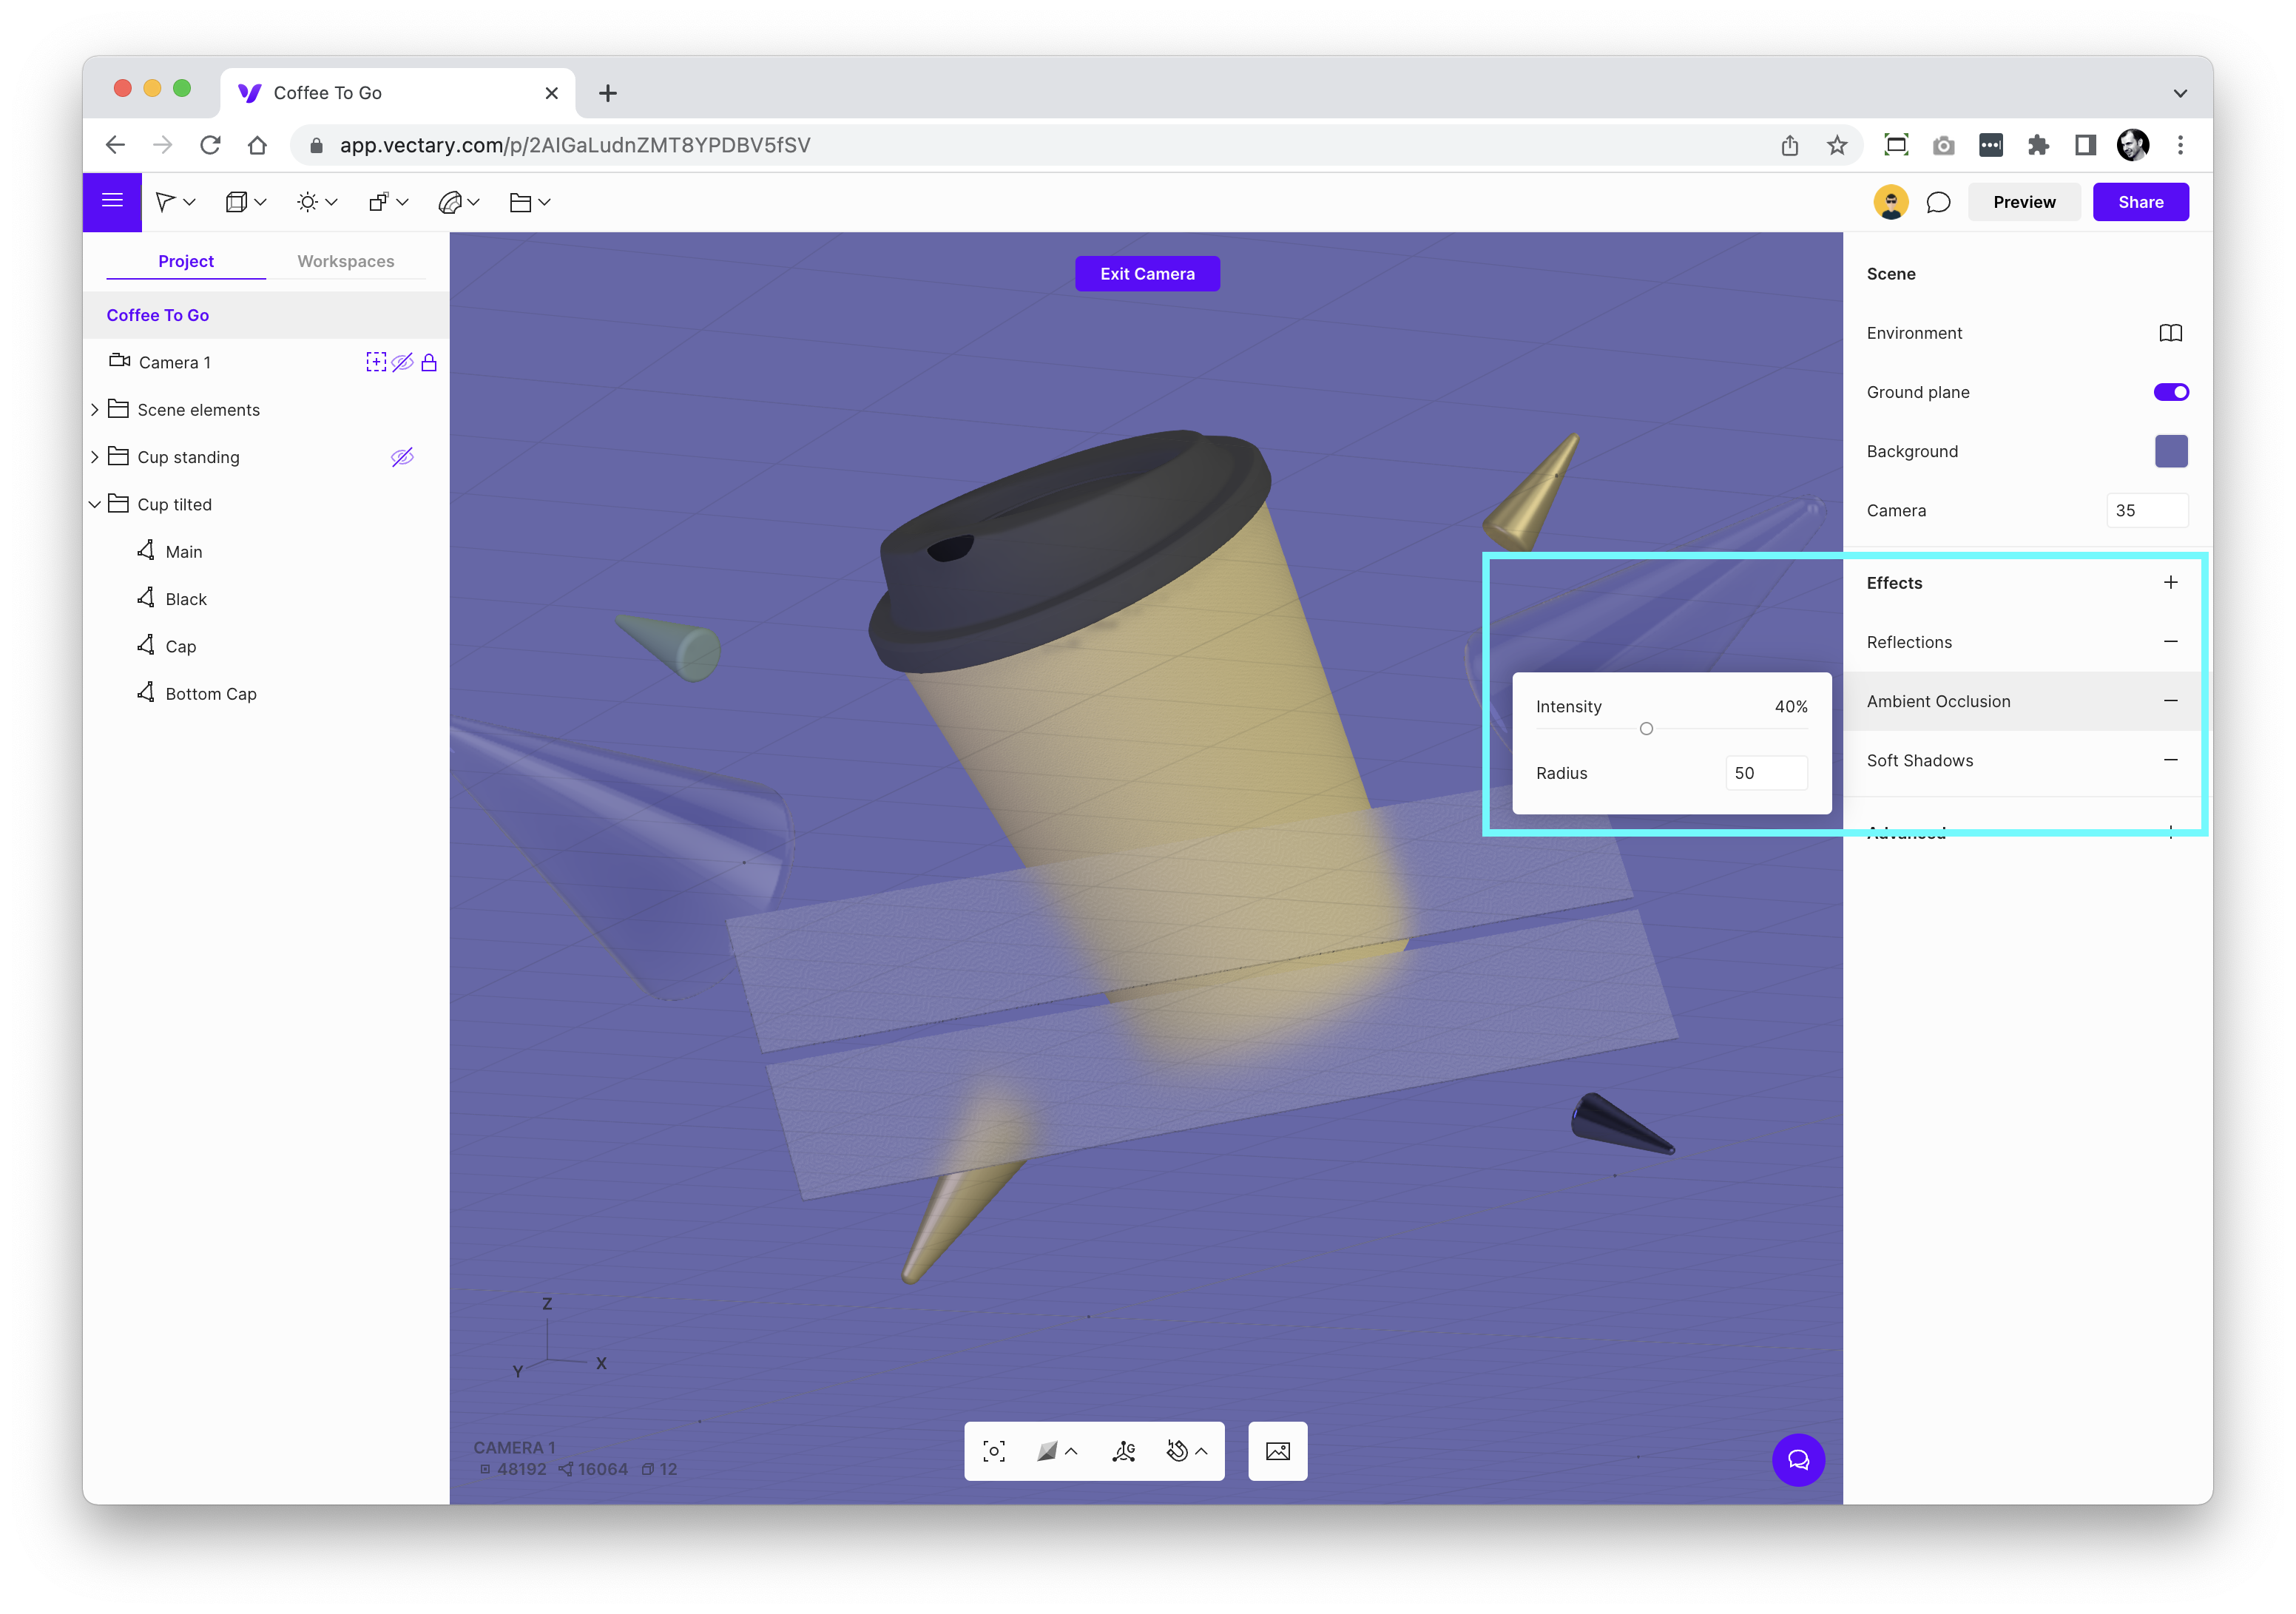
Effects (web only)
If you have the Ground plane turned on or a light that casts shadows, you may want to add Soft Shadows from the effects list. Another similar effect that gives shadows/depth to your 3D objects is Ambient Occlusion which is real-time computed same as Reflections
Step 3: Preview the WebAR embed
Sometimes it is good to preview your WebAR viewer before embedding, or you just want to share the Augmented Reality preview with your colleagues and clients. Go to Share click Share to web, copy the direct link and open it in a new tab.
Step 4: Place the web embed to your website's code
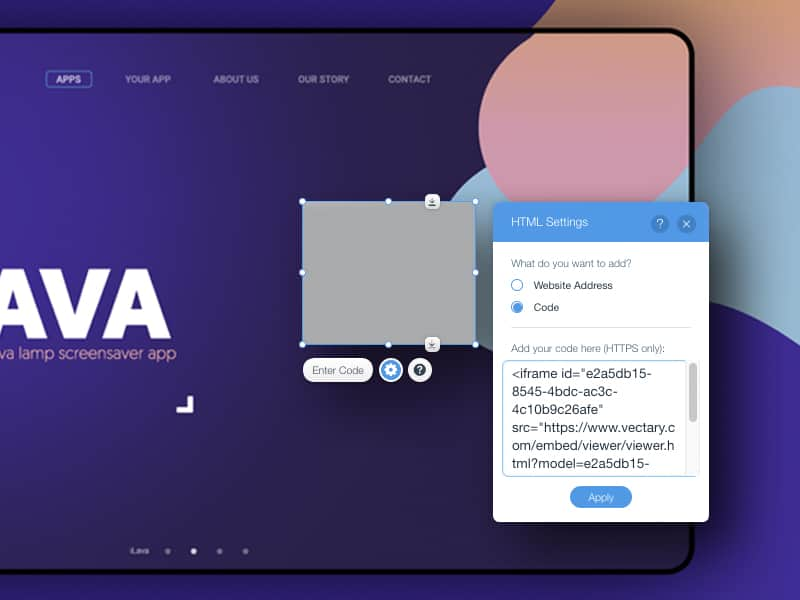
Just copy and paste the web embed into your site from the Share section. The principle is the same as the YouTube embed code. You can also embed files in services like Squarespace, Wix, Shopify, Weebly, Webflow, or similar.
How to edit the 3D web embed code
Users familiar with HTML code can edit the generated iframe code. For now, only the basic parameters such as width, height, and border frame can be changed. In the future, there will be more customization and editable options available in the embed code. These will be accessible without the need for any coding skills. So for example, if you want to resize and make your embed smaller so it fits nicely onto your website, change the attributes “width” and “height” to fit your needs. We recommend keeping framerborder at value “0” to make the object blend in nicely with the background.
Step 4: How to edit the 3D viewer on your website
Embedded objects on the website are the final results of 3D designs created in the Vectary editor. However, Vectary takes it one step further and allows you to edit already embedded WebAR projects and change them in real-time. Open the project in Vectary, make your changes and refresh it next to the Share to web settings. All changes should be applied instantly.

FAQ
How much does it cost to use the Vectary 3D web embed?
WebAR testing is now a part of the PRO plan with a limited number of views. Check our pricing to learn more.